You can create backups of your website and databases, download them and restore them using the Backup Manager from the Plesk Panel on your Windows Hosting order.
Step 1: Accessing the Backup Manager
-
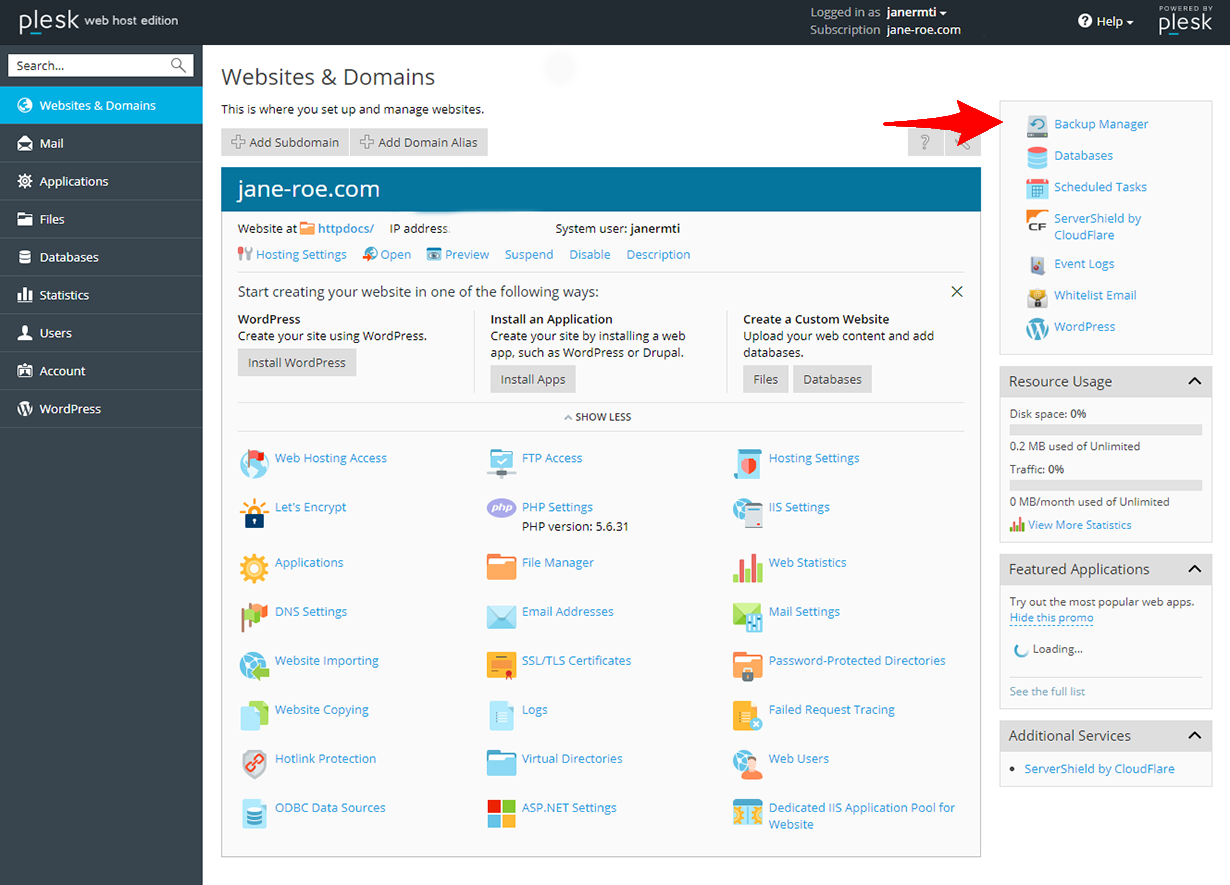
Access your Plesk Panel from the control panel.
- On the Plesk panel, under Websites & Domains section click Backup Manager in the right corner.
Step 2: Creating Backups
You can create backups for your hosting in two ways. i.e Manual Backup and Scheduled Backup.
Using the Manual Backup option, you can generate a backup of the website instantly. If you want to have periodic backups of your website to be created automatically use the scheduled backup option.
i. Manual Backup
- On the Backup Manager page, click Back Up.
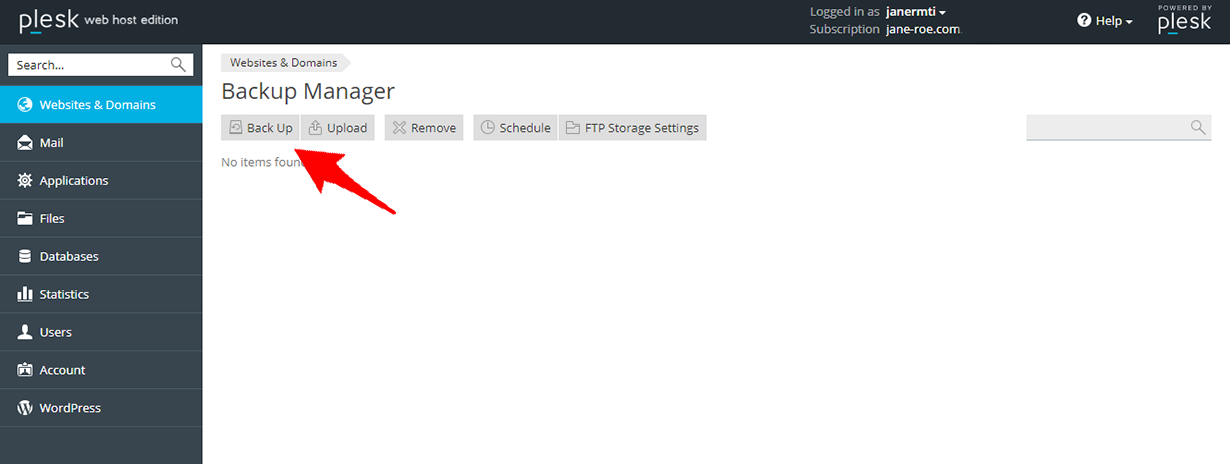
- On this page, you can select the options for your backup.

- Back up - You can select the type of content which you want to include in the backup.
- Store in - Lets you select where the created backup will be stored. Click Configure, to configure a remote server to store the backup.

- Type - This option creates incremental backups, which include only the modified content since the last backup or you can select full to create an entire backup.
- The Backup Settings section, lets you add comments for the backup files, send a notification when the backup is complete and also exclude specific files from the backup.

- Click OK to create the backup.
ii. Scheduled Backup
You can configure Plesk to create automatic backups for your website using the scheduled backup option.
- On the Backup Manager page, click Schedule.
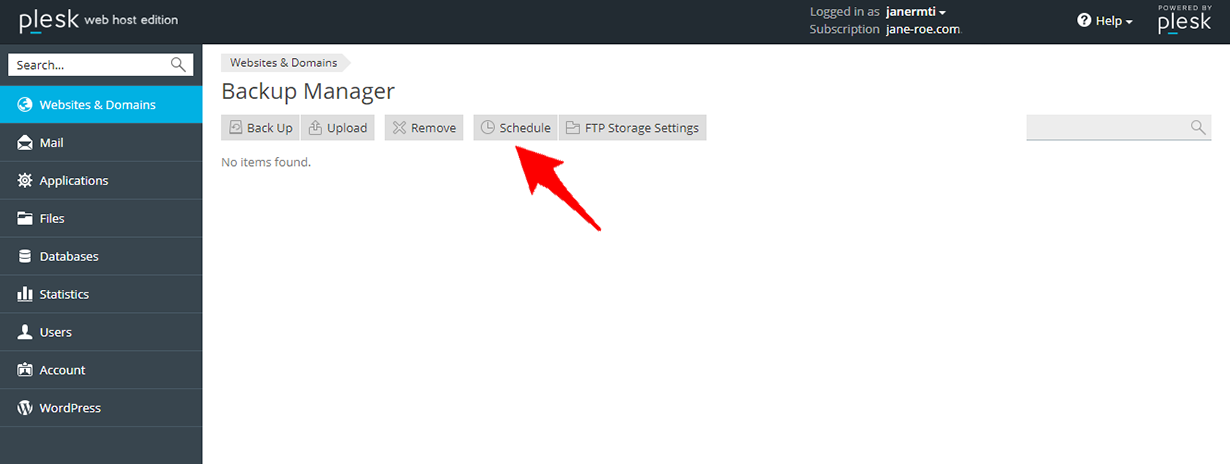
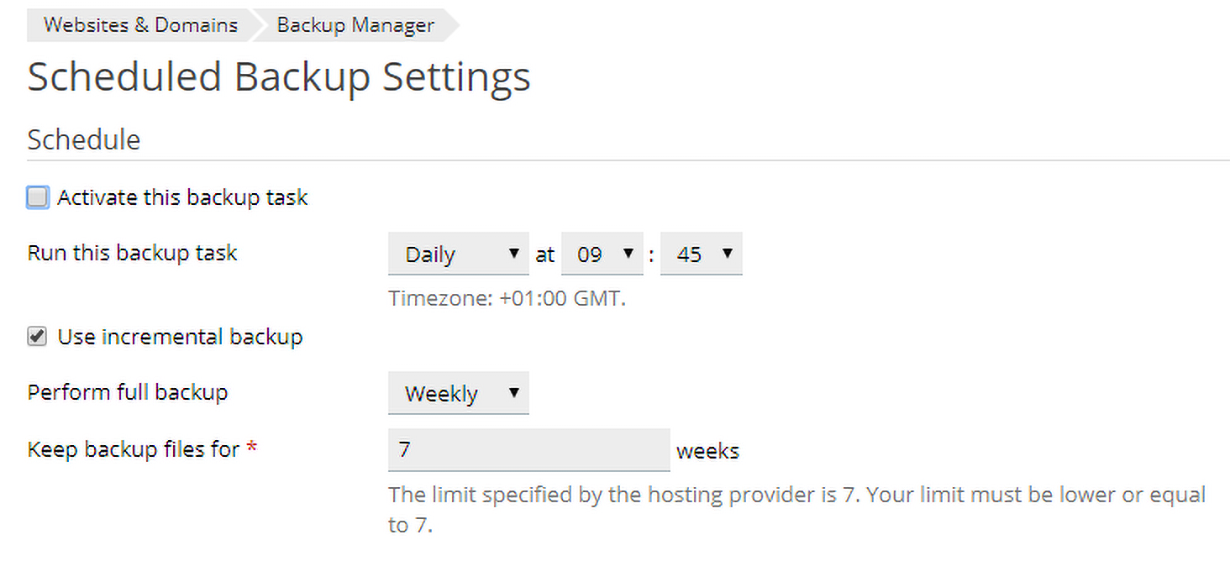
- Under the Schedule section, you can configure the backup schedule.
Under the Run this backup task you can configure the frequency of backups by setting the desired frequency and the time for the backup to start.
You can also select the type of backup and set the frequency for the full backups.
- Under the Backup Settings section, you can select the files to be included in the backup and the email address to receive alerts when the backup is complete. You can also exclude specific files from the backup by mentioning the path.
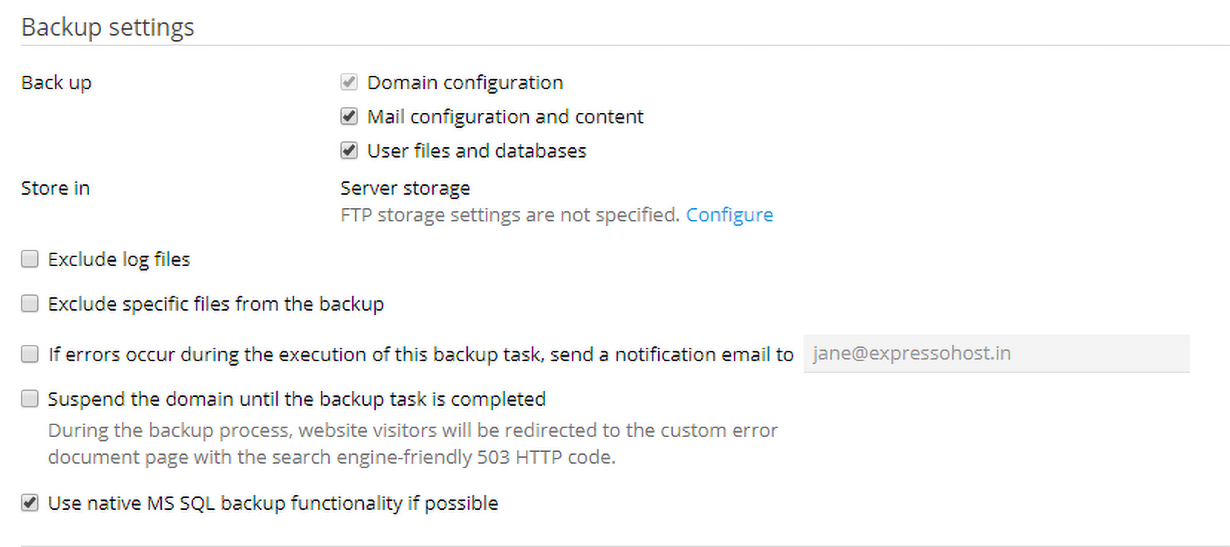
- Back up - You can select the type of content which you want to include in the backup.
- Store in - Lets you select where the created backup will be stored. Click Configure, to configure a remote server to store the backup.
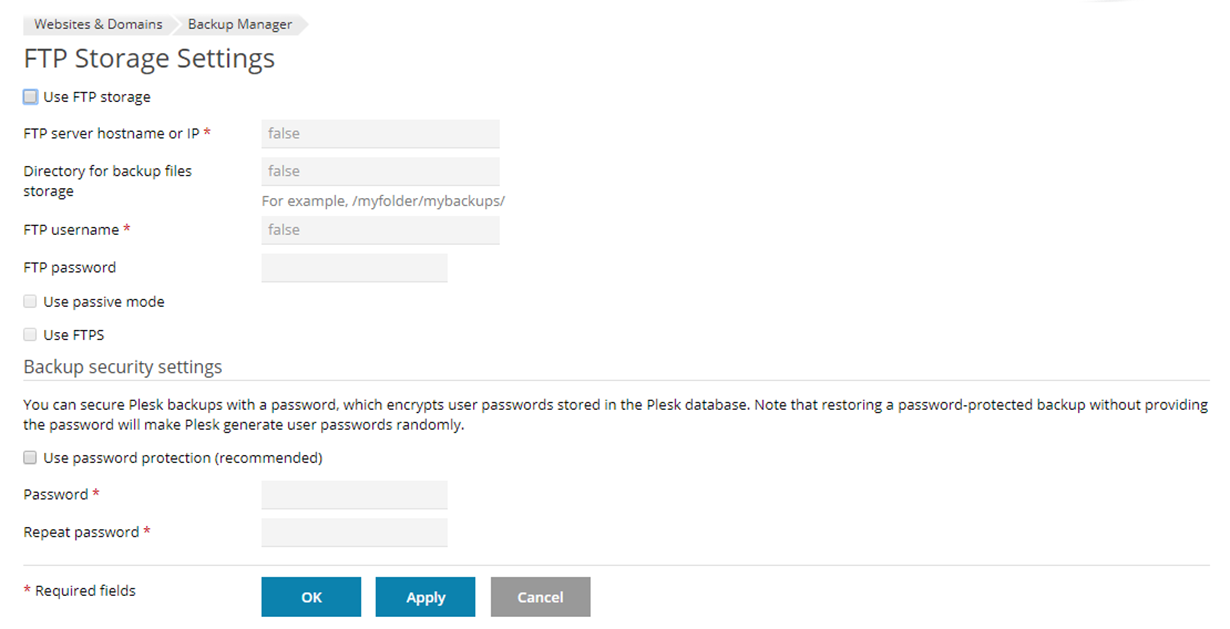
- Click OK to create a scheduled backup.
Step 3: Restoring Backups
-
You will see a list of backups available for your website on the Backup Manager page. This includes the backups stored on the server and remote storages.

-
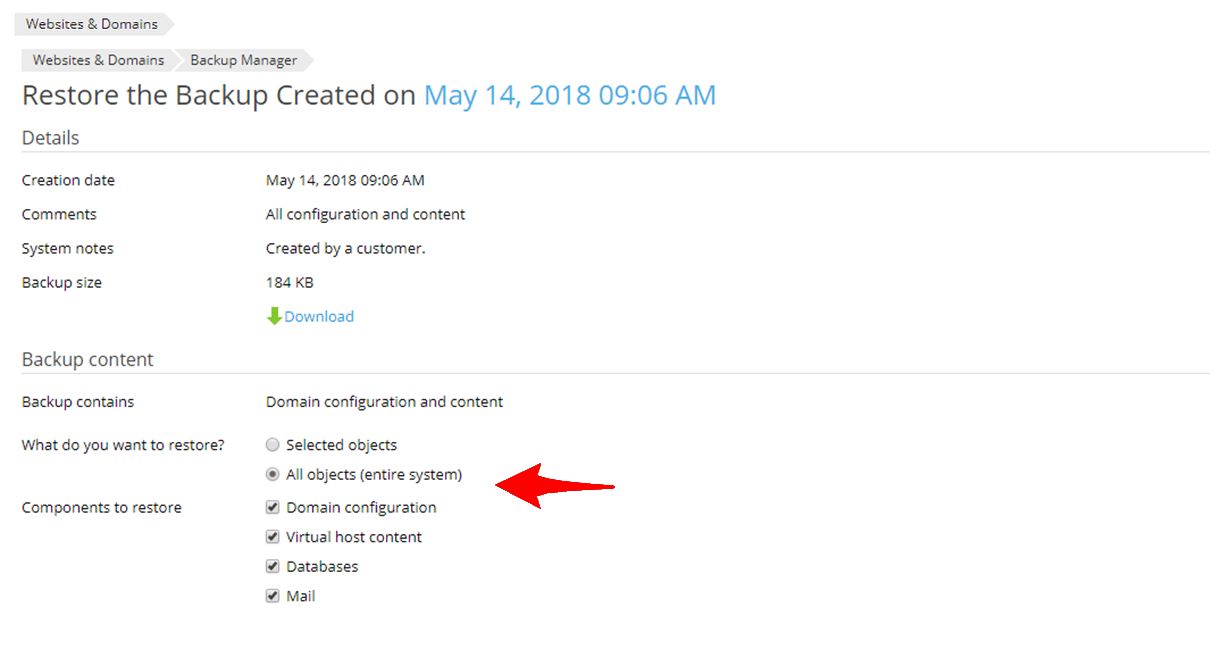
Click the backup link you want to restore.
-
Under Backup Content section, click All objects (entire system) radio button to restore entire site backup or click Selected objects radio button to select the parts of the website you want to restore.
-
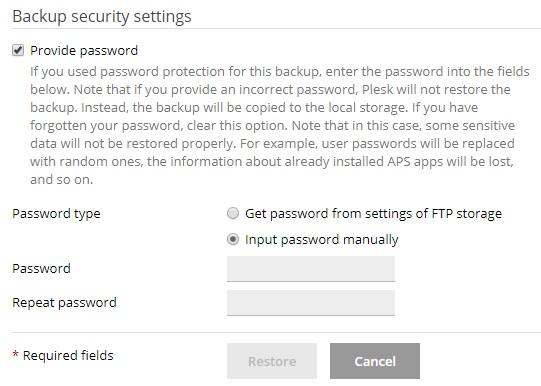
If the backup is secured with a password you can select the option to fetch the password automatically or manually input the password in the corresponding fields.
-
You can click the checkbox under the restoration options to receive a mail notification when the restoration is complete and also suspend the domain during the restoration process.

-
Click Restore to begin the restoration.
